Tutorial by: cajunwolf
![]()
The purpose of this tutorial is to update the technique of creating or editing pathmaps created by the debugger tool. The original tutorials by Arc D Wrath were written before the debugger was out and explain how to create them from scratch. We now can generate pathmaps with the game engine, poor though they are, and hand edit\paint them in ED42 and convert the painted surface textures back into pathmaps. This tutorial is by no means meant to replaces Arc's tutorial but supplement them with the modern technique. I learned how to do AI from his tutorials and is my suggested reading for anyone who is interested in Battlefield AI.
Now, in order to learn how to do this and how bots use pathmaps we are going to do it the long way, step by step. This is the best way to learn. There are the "Bot Tools" and they are great but, when something doesn't go right you will know what it is if you have done it the hard way several times. I started doing it by hand and still do it that way, though I use batch files to do most of the work for me.
Step One Converting Pathmaps to Terrain Texture.
Step Two Preparing the editor.
Step Three Basic Painting and Saving.
Step Four Working with Difficult Structures and Interiors.
Step Five Converting Back to Pathmaps.
Skill Level
Medium-High
Know ye thy AIPathFinding.con file for it is thy friend!
Excellent knowledge of Battlefield AI.
Good working knowledge of ED42 and Battlecraft a must.
Good mapping knowledge
Patience above all! Rome wasn't built in a day. Painting your pathmaps in ED42 is a very time consuming task.
Tools required
Editor42 version 0.41
Rexmans AI_GenerateForLevel
Genpathmaps by FourCentsShy
Madbulls tgaMerge and undxt tool
PhotoShop ver 6 or up. A comparable image editor will work.
ACDC's Photo Canvas light or comparable image editor to save a bmp file as a 1 bit image.
Battlefield MDT ver 2.75 as it has WinRFA and GUI_RFA_Pack which are the rfa file uncompress\re-compress tools.
Tool kit
CW_Pathmapping_ToolKit is a tool kit that I have assembled for this project. It contains the following tools that you will need.
AI_GenerateForLevel
tgaMerge
undxt
Getting Started
Ok it is assumed here that you have a map ready to work with and the following criteria are met.
The map is extracted in the ED42 dev directory and working in editor.
Basic ai has been added and a full set of pathmaps have been created.
You have the necessary tools.
You have your working folder set up.
Converting Pathmaps to Terrain Texture
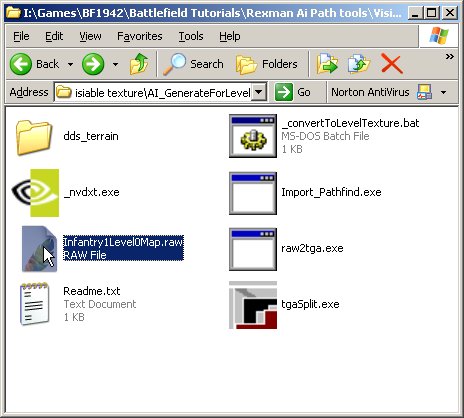
Lets do the infantry first so we need to convert the Infantry1level0Map.raw into a set of terrain textures. You always use the Level0 maps because they contain the greatest detail. For this we need Rexman's AI_GenerateForLevel tool. Open its folder and paste a copy the Infantry1level0Map.raw map into it. It should look like this.
Now we need to edit the "_convertToLevelTexture.bat" batch file for the map type and size. Now a word of caution for those of you that are not familiar with batch or ".bat" files. Change only what I say and nothing else! Batch files can cause some serious problems if you don't know how to use them. Also syntax is important so type it just like the file name.
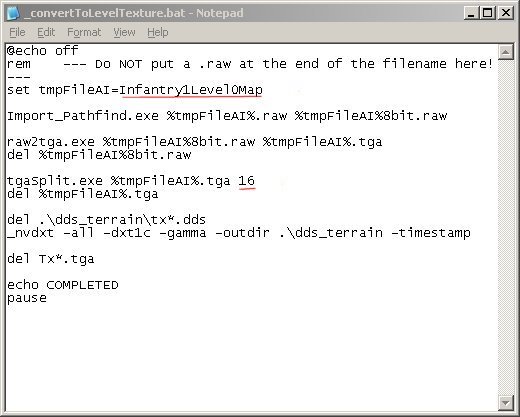
Ok RIGHT CLICK on the _convertToLevelTexture.bat file and in the drop down menu select EDIT. It should open in Note Pad and look like this.
Now I added red underlines to the things that need to be changed. First is the pathmap name to be processed without the extension. This is already set as you can see to Infantry1Level0Map. If you were doing the Tank0Level0Map.raw you would put Tank0Level0Map instead. Next item is the maps size. The value 16 that is underlined in red tells us its a large map with 16 texture segments per side. It works like this ...
4 Segments = Small map (4x4) or 1024x1024
8 Segments = Medium map (8x8) or 2048x2048
16 Segments = Large map (16x16) or 4096x4096
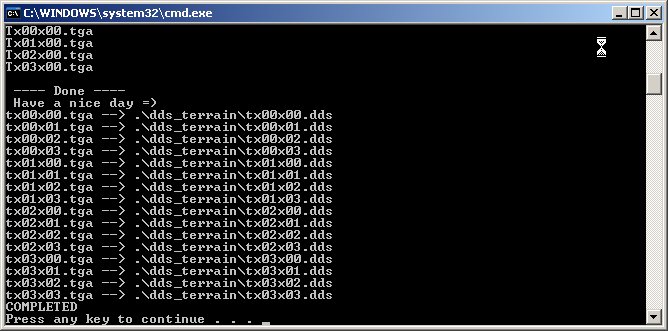
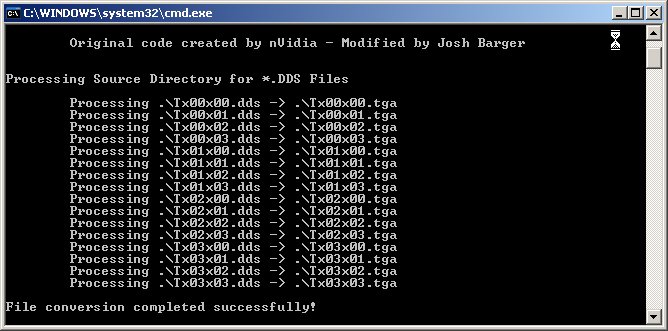
So if its a small map change this value to 4, If its a medium 8, and if its a large 16 segments. Once you make the changes save it and we are ready. Now double click the batch file and a cmd window should pop up on your screen.
It will tell you when completed. If your anti spy ware or virus program pops up ..select allow.
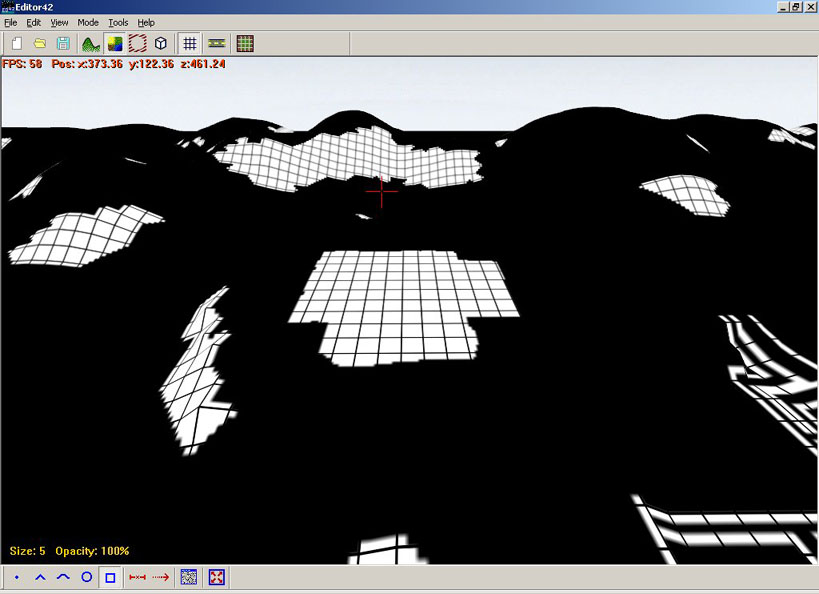
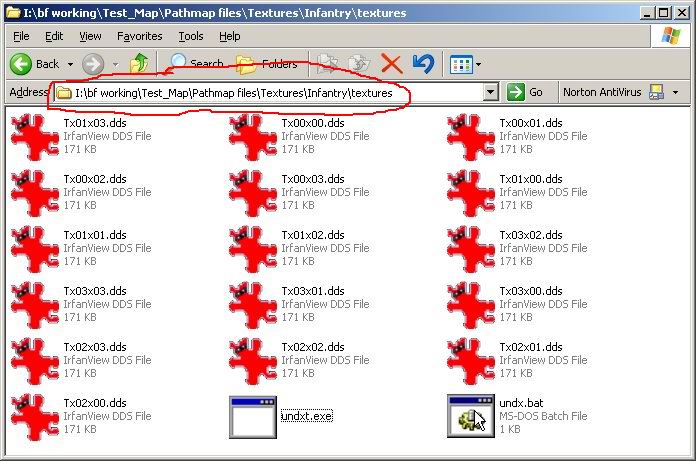
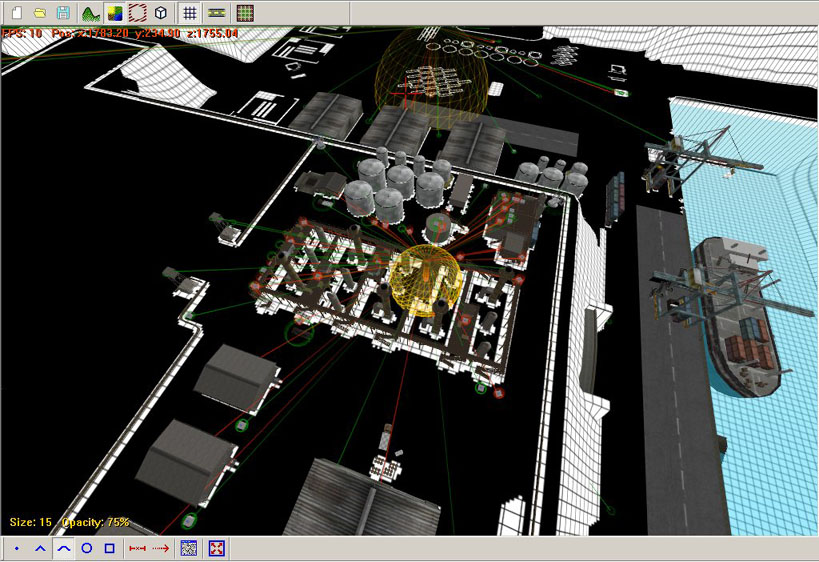
Now look in the dds_terrain folder and you should find your Tx*.dds files. Move all of these into the maps texture folder overwriting the ones there. Now this of course is the copy of the map in ED42. Open Ed42 and select your map ..when it open's you will see your infantry pathmap as the terrain.
Preparing the Editor
The following instructions are very important! If you do not have these settings correct you can waste a lot of time painting your pathmap and have it not work right. Please double check your settings each time you open ED42 and begin to work on your map.
To prepare the editor to paint your pathmap do the following.
Select the F2 key or the
icon to go to texture mode.
Press the G key and this will get rid of the detail texture and place a grid on the terrain.
Press the F key and you do away with the fog.
Now lets go to the texture tool bar, bottom left in the editor interface.
Texture tool bar
From this tool bar you select, from left to right, brush type, brush size, opacity, texture interface, and paint whole map buttons.
Press the E key or the
icon on the Texture Tool Bar.
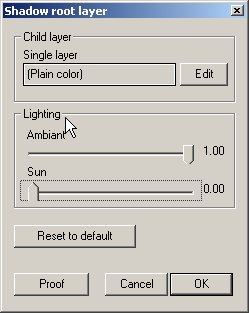
This will bring up the Texture-Shadow root layer interface.
 |
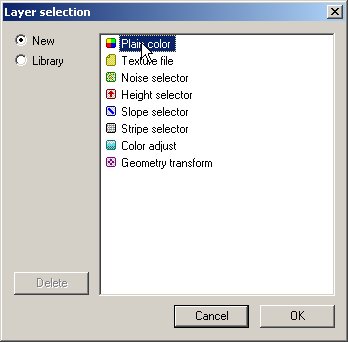
In the child layer section, click on the window where the word default ( where the mouse pointer is) is and you will see the Layer selection window on the left. Here select Plain color and click OK. |
 |
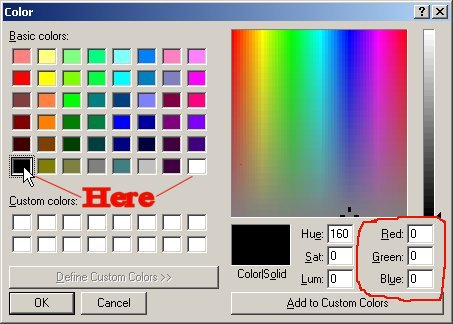
Now, still in the Child layer section, click on the edit button. It will pull up the color picker.
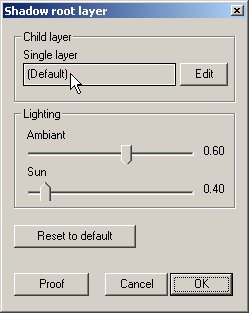
Ok, this is important, you have to use PURE white or black. I have it marked in red in the image. You can tell by looking at the RGB values also. Notice I chose pure black and the RGB values are 0, 0, 0 (circled in red). If I had chosen white these values would have been 255, 255, 255 instead. Once you have selected your color click ok. Back to the Texture Interface (Shadow root layer window) there is one last thing that HAS to be done.
Now in the section that says lighting (where mouse pointer is), move the "Ambiant" slider ALL the way to the RIGHT until it says 1.00 then the "Sun" slider ALL the way to the LEFT until it reads 0.00 then click ok. This is important or you will end up with a shadow effect .. no good for pathmaps.
Now back to the texture tool bar.
Select the
opacity icon and set it to 100%. This is a very important setting!
Select the
brush size icon and set it to Tiny. Use a larger brush size if you are using the square brush and covering large areas.
Select the
dot brush or
square brush (start with the dot brush, its used for detail). The other brushes CANNOT be used for pathmap painting. They have a gradient built in and that's bad for pathmaps.
Now we are ready to begin painting.
Painting the pathmap
Now we are ready to get down to work!
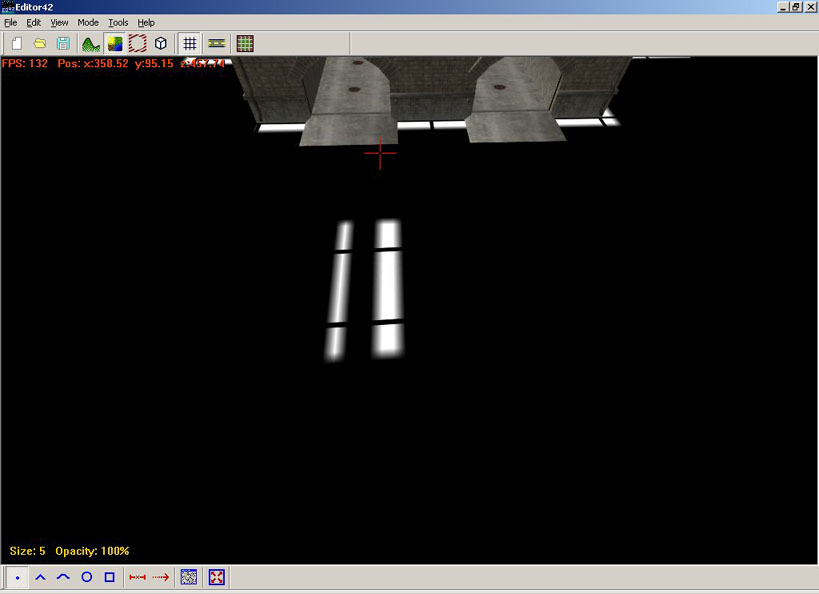
First thing we need to look at is your line size or width depending on how you look at it. Using the dot brush it will make a line about 1 pixel wide. This is to small to make it through the conversion process back to a pathmap in most cases. Always paint at least two lines or pixels wide. See the example below.
Now the line on the left is one pixel or brush stroke wide and the one on the right is two.
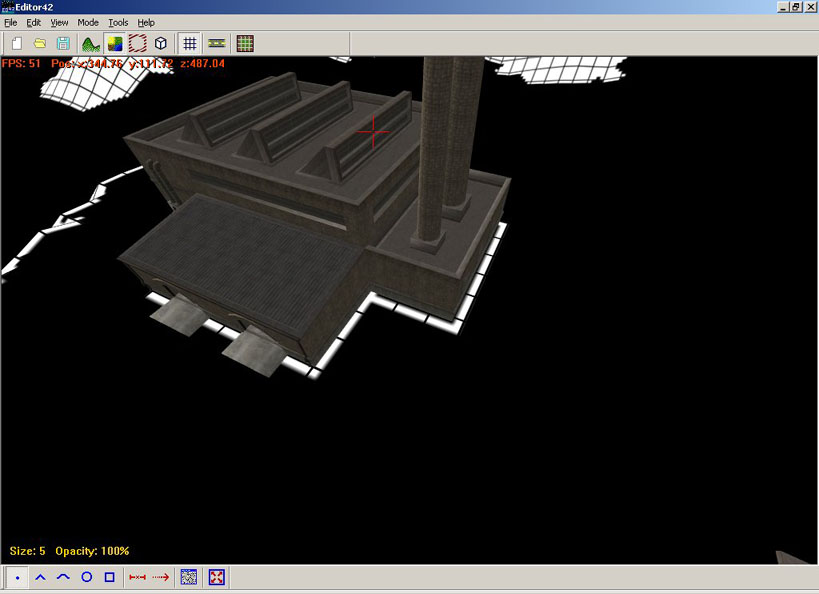
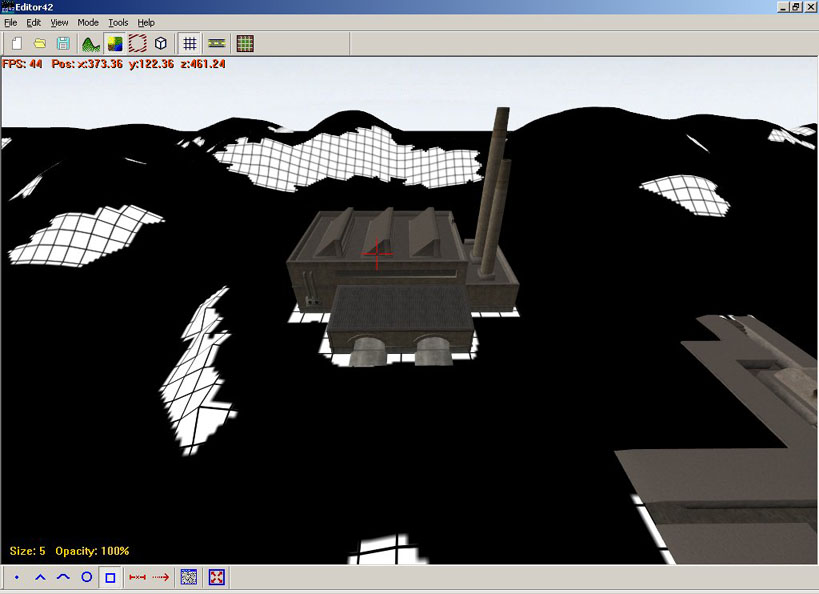
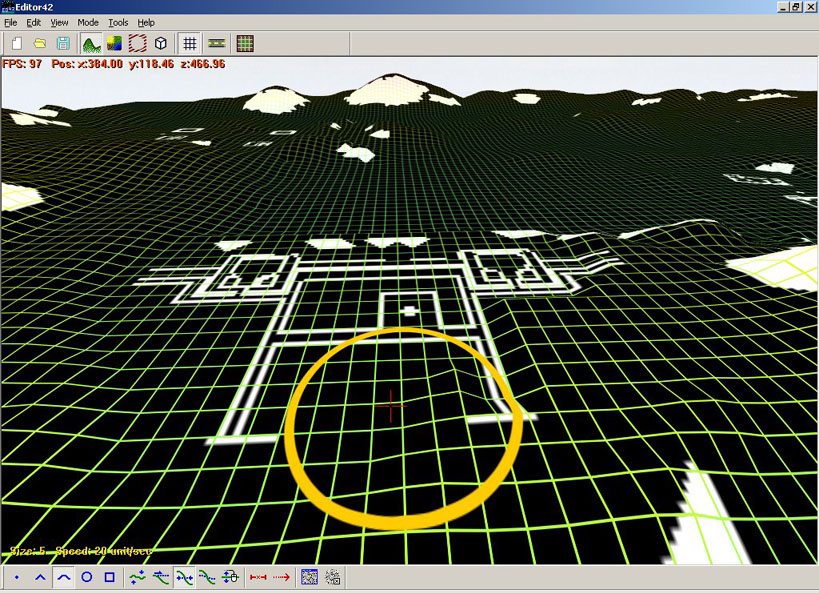
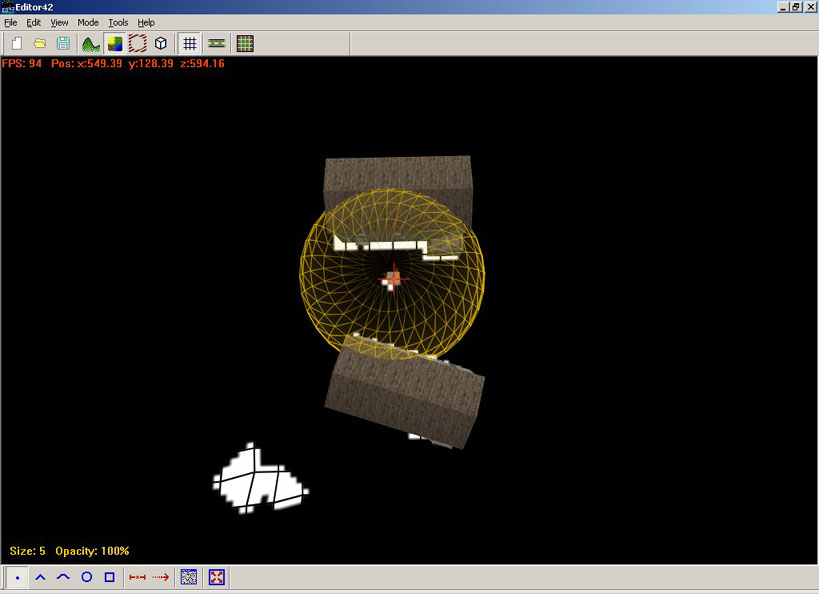
Ok now lets look at this factory. There are three things here I want you to see. First, look at how the texture is "skewed" to one side. Any of you who have made a map in Battlecraft has seen this effect in the way it skews\blends the textures in two directions after material map\surface mapping. Well the debugger it seems does this when generating pathmaps. This is the main reason pathmaps dropped in a map straight from the debugger do not do that well. Lets look at the other side.
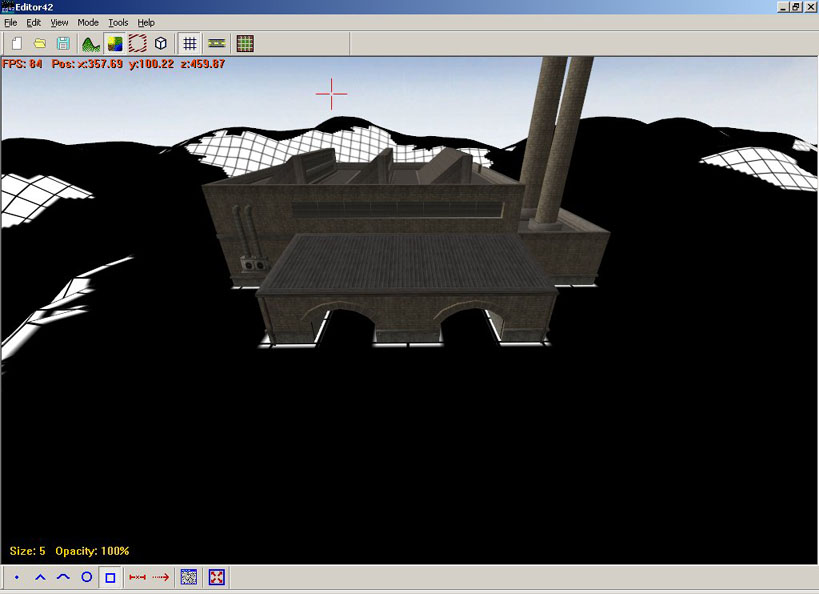
Now from this side you can see the effect as the textures are skewed away from us in the direction of the red cursor. Sorry to spend so much time on this but its the reason we are doing this whole painting the pathmaps in ED42 thing. If the debugger made perfect pathmaps we wouldn't be wasting time here would we? Ok back to work.
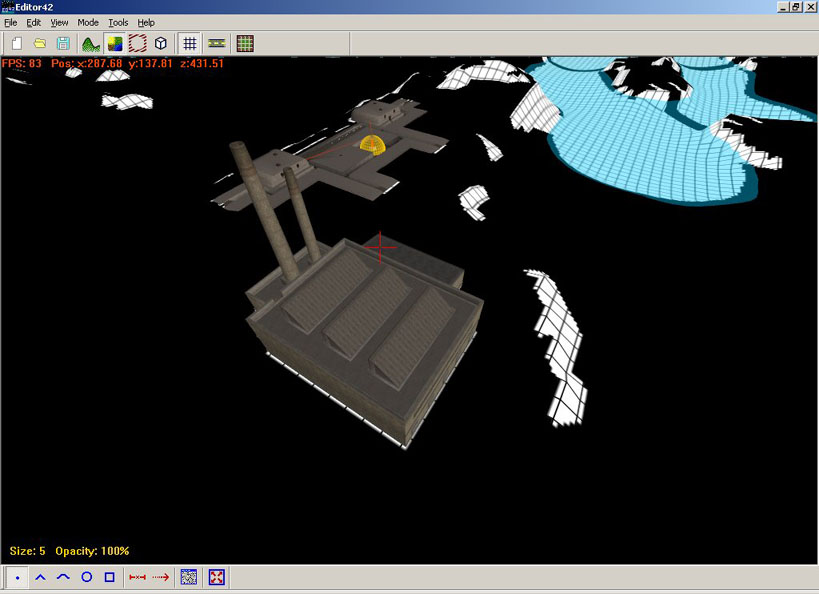
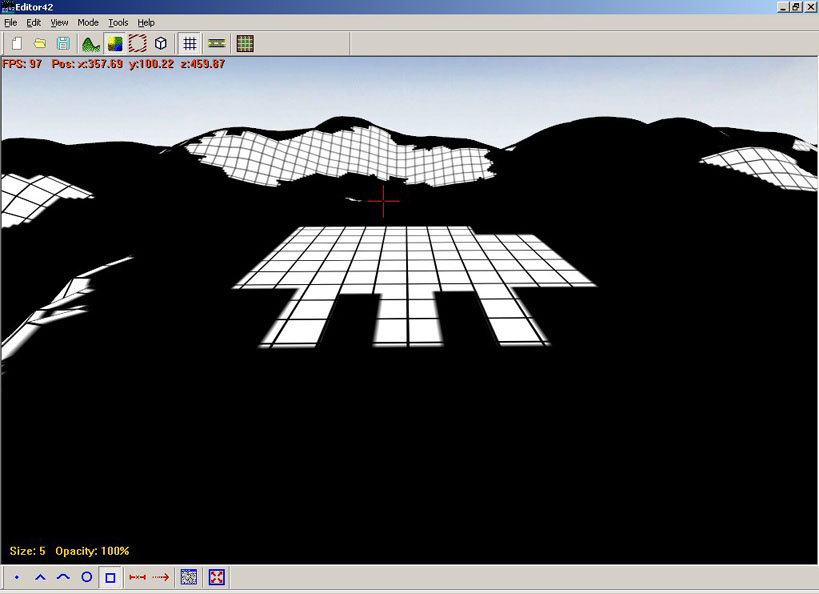
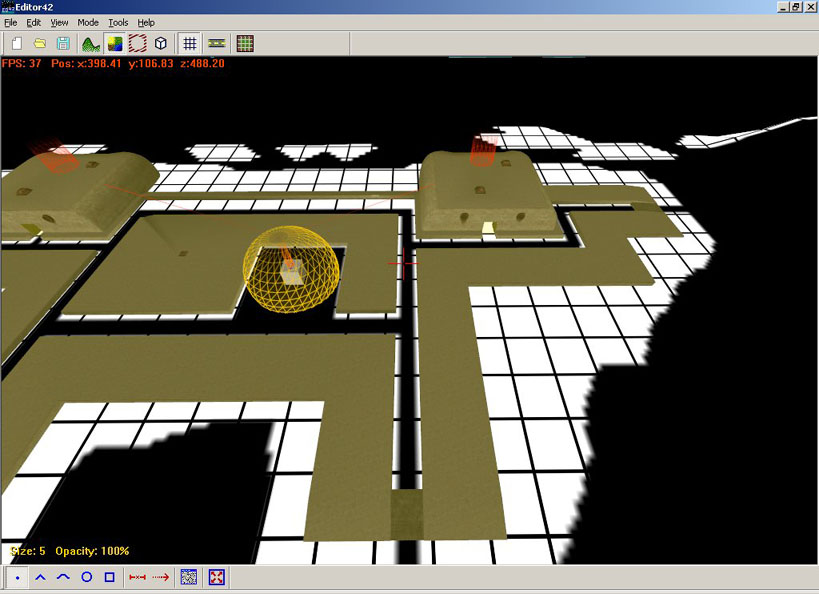
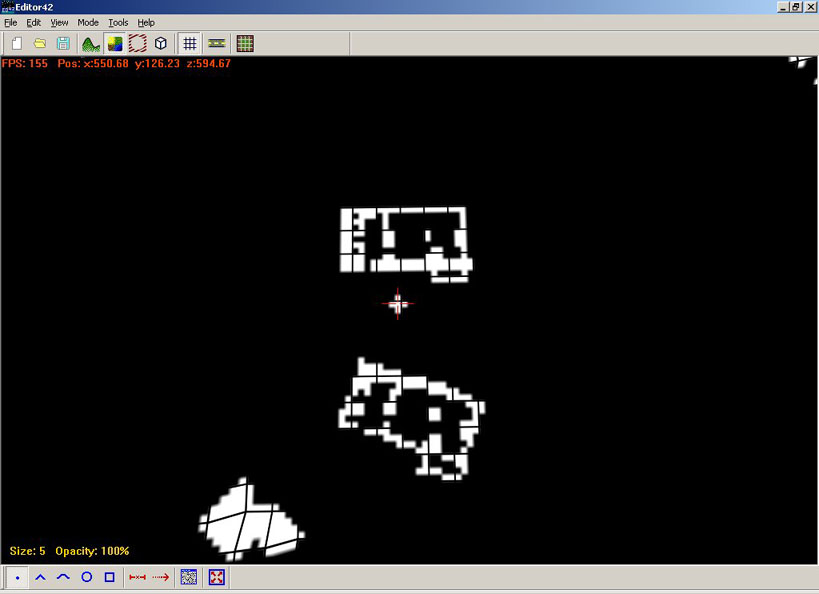
The second thing I want to point out is illustrated in the next image. You need remove the objects from view with the "O" key. All of the open areas except the garage bays, marked with red, needs to be painted white. Remember this, White out ANY AREAS that you do not want the bots to go OR that they cannot go. Your AI will work much better for it. The reason being it really effects the "smallones" files (mapname.raw and mapnameinfo.raw files) if you don't. I am not going to go into the smallones now, perhaps in a future tutorial. You can check FourCentsShys site for more info.
My technique is to go to a square brush, adjust the size to the area I will be painting, and lay it on. In the image below you see how I have done this.
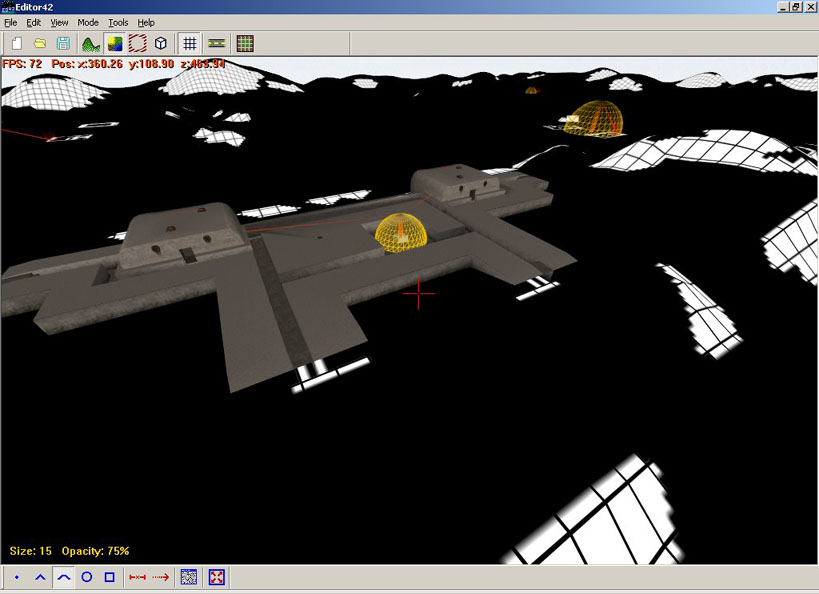
Next I am going to bring the factory back into the picture by clicking the O key. In the image below you can see the factory on the new white "pad" as I call it. It is now a simple matter of "carving out" in black the areas where the bots can go.
To do this go to Object Mode (F4) and click on the factory to make it active. Now roll your mouse wheel until the garage bays have the terrain as the floor. Look at the image below. Here I just went to the DOT brush and trimmed away all the unwanted white.
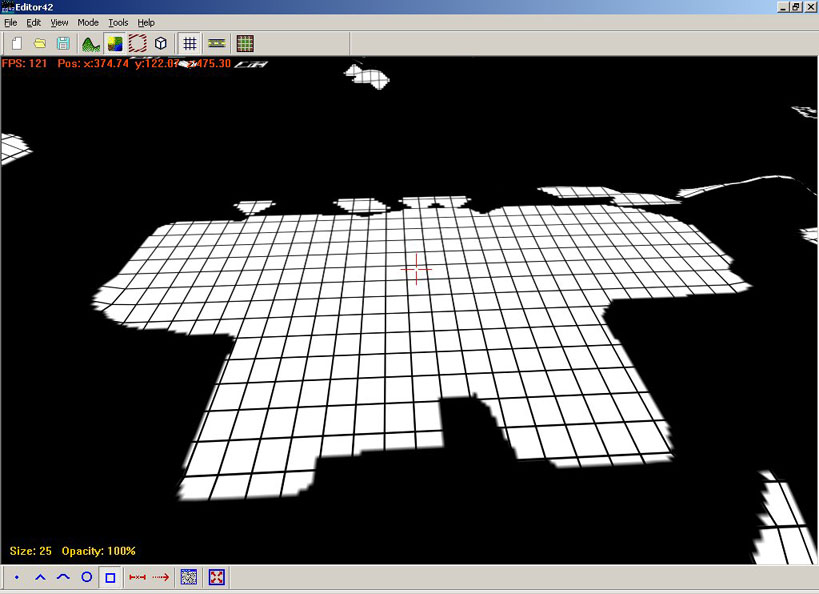
Looks much better doesn't it? Lets remove the factory and look at it ok.
See what I am talking about? Nice and clean. Only the areas in the factory are pathed do go or black that the bots can use. By painting everything white and even going beyond the area of the factory I can see better what I am doing while painting in black.
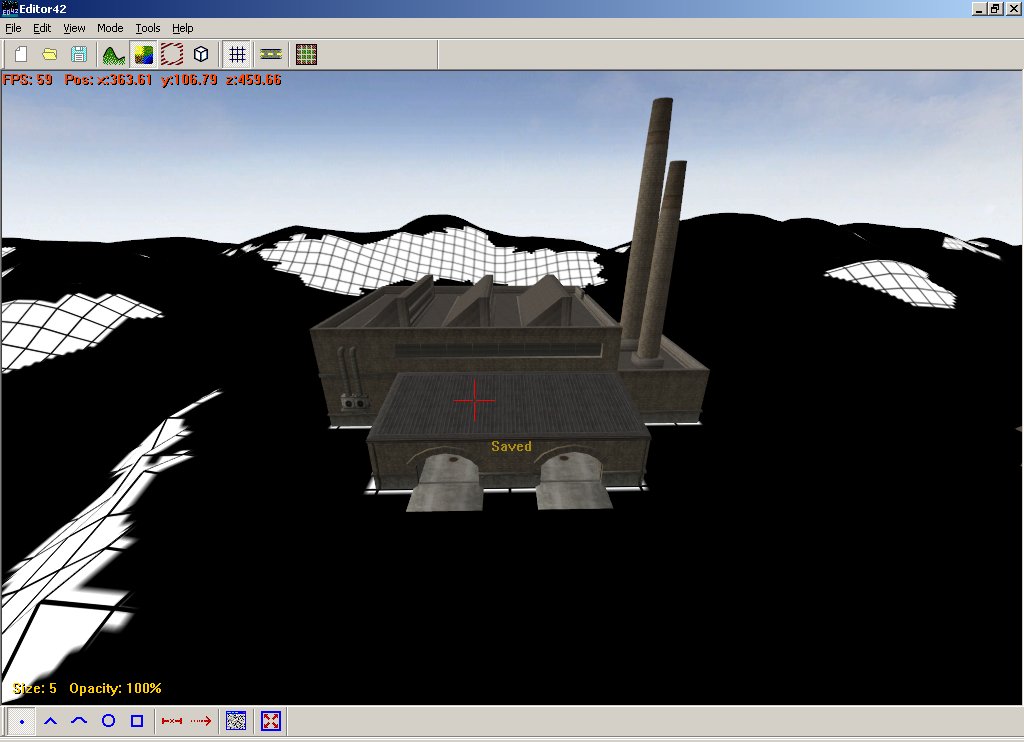
Time to Save
Before we go any farther we need to save our work. The ability of ED42 to save the texture separate makes it perfect for the task of pathmapping. You are going to really see this in the next section but for now do this. Click on > Tools > Save > Texture like in the image below.
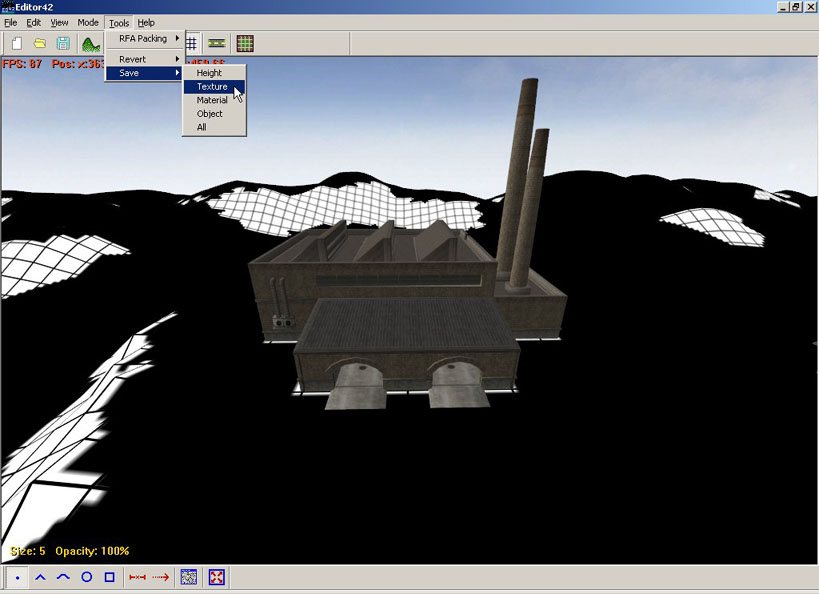
In the little box that pops up select "Yes" and you should see "Saved" on the screen briefly like in the image below.
Difficult Structures
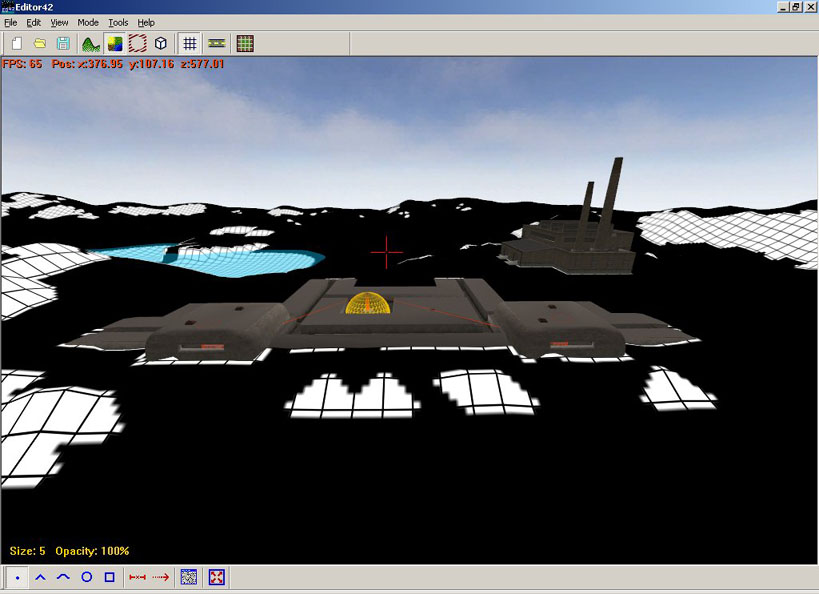
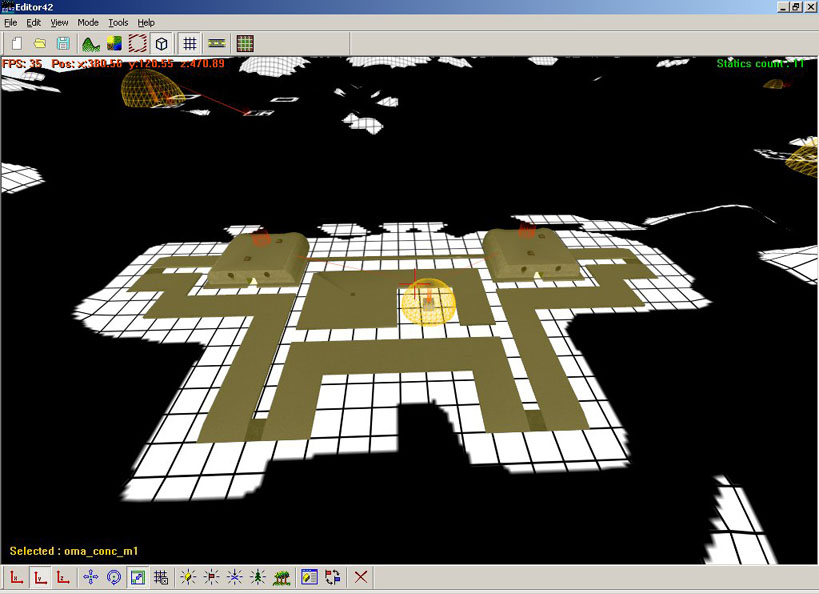
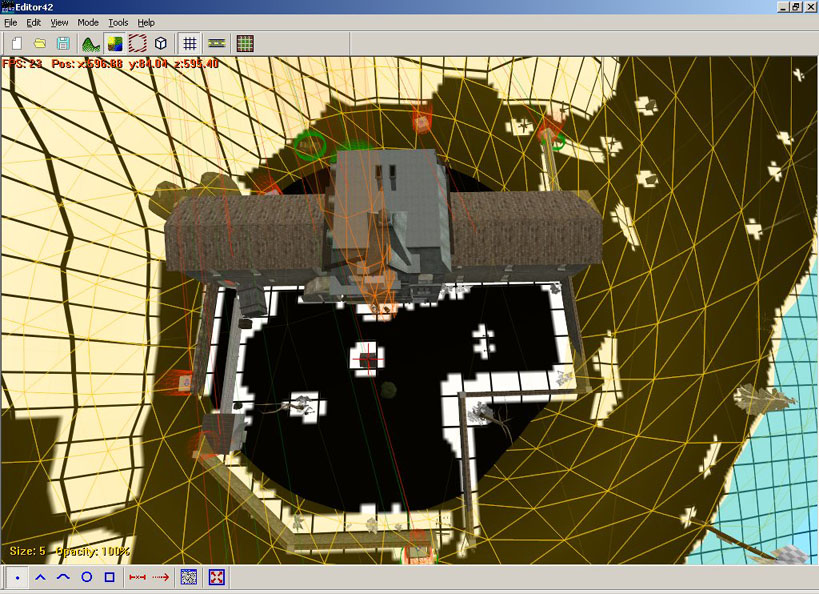
You are going to run into structures from time to time that can be quite challenging to path. The Omaha Concrete Bunker or "Oma_conc_m1" is such a structure. I always wanted to have a T-Shirt made that said "I Pathed the Omaha Concrete Bunker" but I figured people might think me crazier than they do now. It's not that its difficult but in how it is placed mapper to mapper and to top it off it is hard to place in the map which in turn complicates things farther. The mapper ends up poking terrain up and down to get it set right and this results in very uneven terrain under the bunker complex... tuff to path. You will learn that depending on how a structure is placed to the grid can make a big difference on how hard it is to path or if it can be pathed at all. These images are from a test map I made for the purpose of this tutorial so I have Oma_conc_m1 placed just so for the example. If your a mapper this tutorial will teach you to think more about pathing and bots when you make your next map I promise you. In the image below in all its splendor, the Oma_conc_m1 bunker complex.
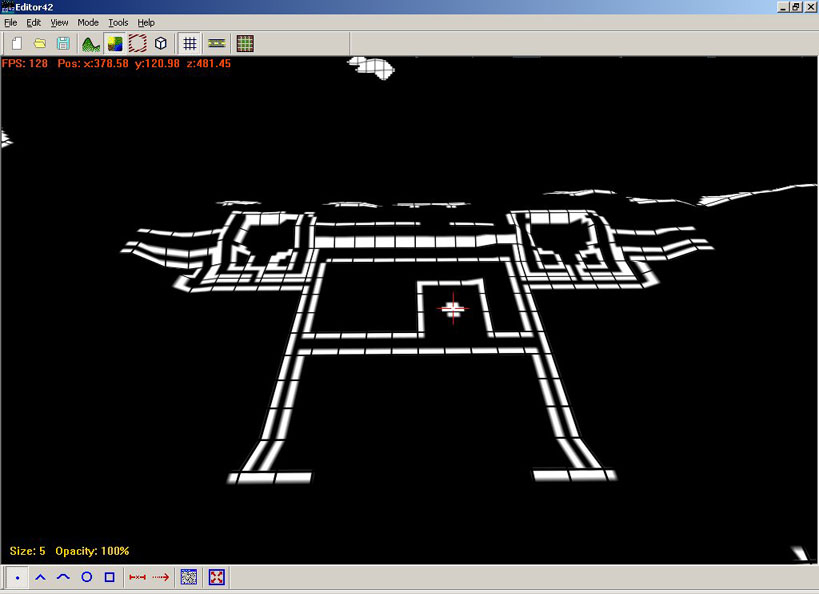
Click the O key to remove the bunker and lets have a look at the terrain below.
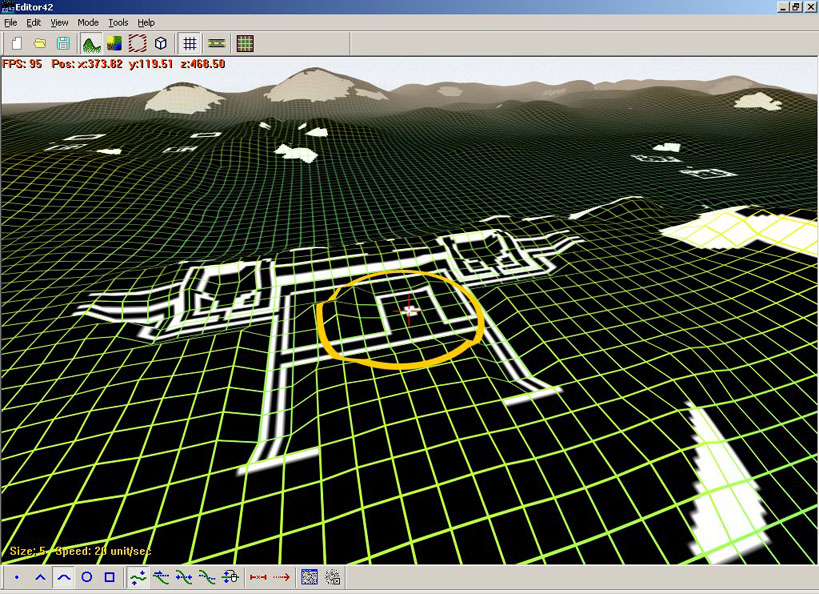
Looks good here but wait till you see it in a map where it was not placed with pathing in mind. We still have uneven ground and that makes it difficult to path as you lower the structure. To solve this and make it easy to path we are going to flatten the terrain. Remember what I was saying above about ED42's ability to save only textures? This is where that pays off. We will alter the terrain to make the structure easier to path and save only the texture then you can re-open the map and its like it was. To do this click on F1 or click on the heightmap button on the tool bar to go to height mode. Select the "Set Terrain" button and right click on an area that's the height you want every thing set to. Now all you have to do is hold down on the left mouse button ant the terrain is leveled to this set point. I used the area where the flag is, where the red cross hairs are in the image below.
In the next image you see where I am holding down the left mouse button and sweeping the terrain all around the bunker complex.
Now in the image below you see where I have gone back to texture mode (F2) and put the bunker back in view.
Now using my technique (each person develops his own) I white out everything under the bunker. See image below.
In the next image you see where I have lowered the bunker into the terrain and am ready to start pathing.
Much easier to work with now. At this point do a save on the textures. In the next image you see the pathing progress as I path the exterior of the bunker.
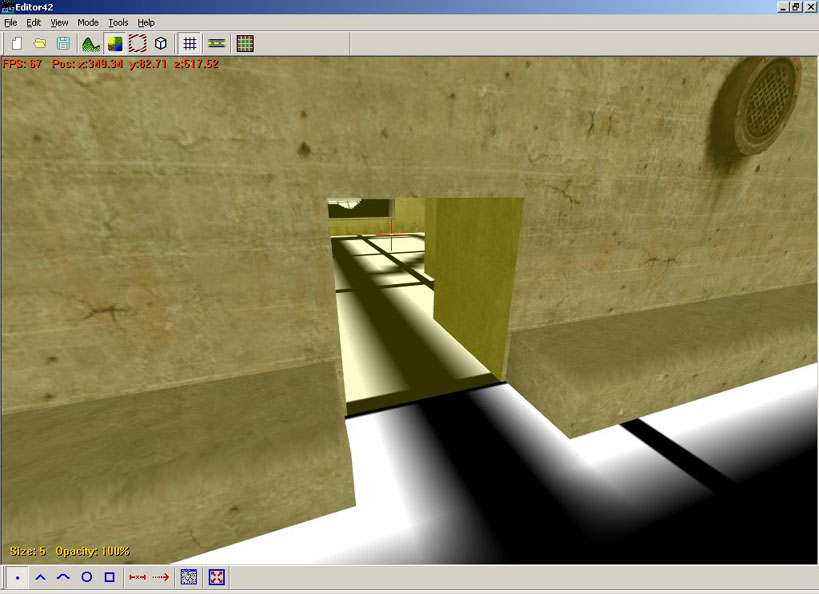
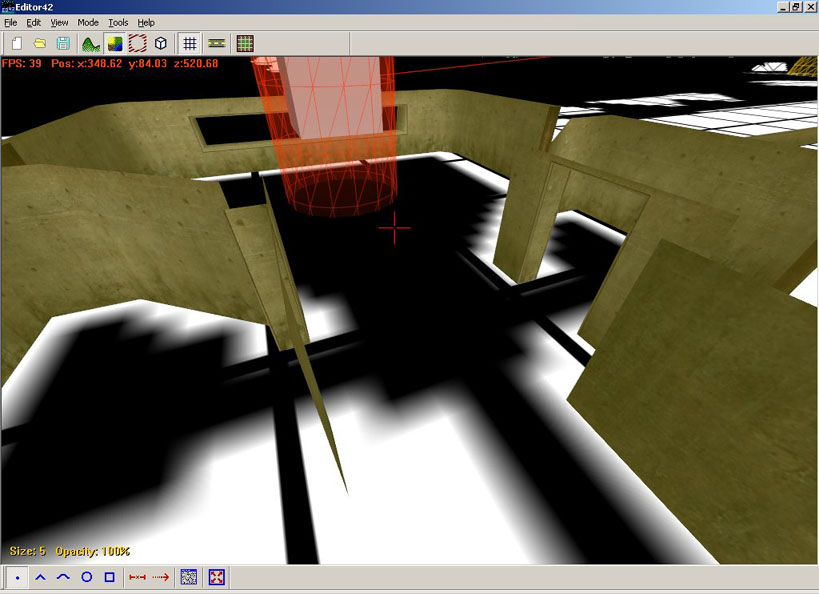
Next we do the interior. See the images below. If you read the users guide you know that holding down the Shift we slow your movements.
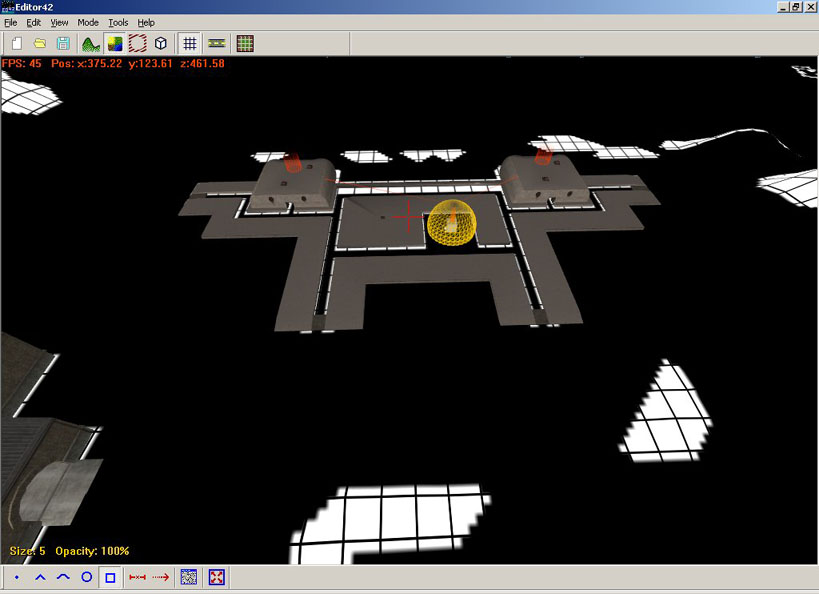
Now the finished product.
Next image is without the bunker in view.
Now the bots should use the bunker quite well.
Angle to Grid Issues
Lets look at another problem that will arise often. Structures set at angles to the grid or not aligned to take advantage of good pathing. In the image below look at two subhouse_5_m1 structures.
The top one I have set properly with the grid and the bottom one I set at like 30 degrees. Lets click the O key and see how things look.
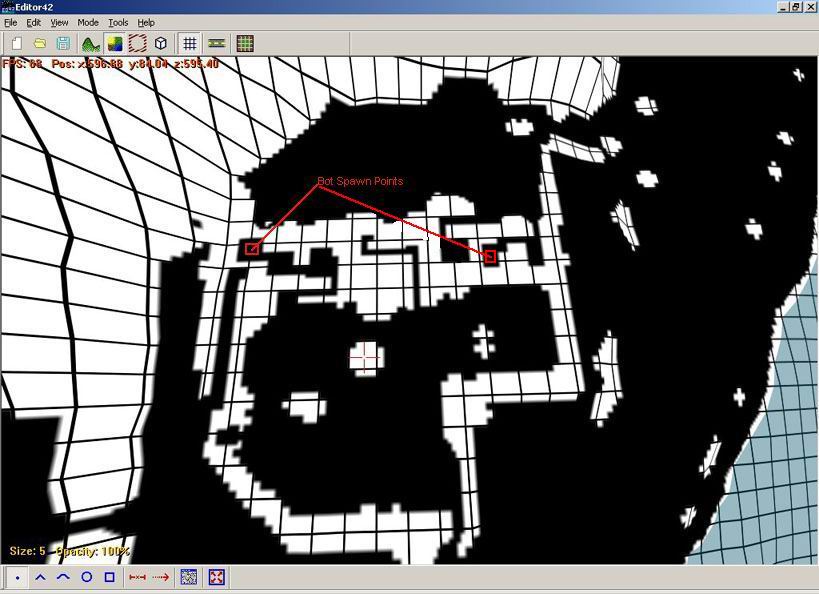
The top one is do-able but the bottom one is ghastly! Now if I had set it at 45 degrees it would have been do-able for the bottom floor. In any case in the condition it is in I just white it out. This is a interesting building to do by the way. I usually path the second floor on the right and path the bottom floor on the left. You can spawn bots on either floor or both but they have trouble getting in the upstairs doorway. The only reason they would go up there would be if they knew an enemy was there. If you want them to enter you can place one of the small wood crates just right to create a step buy using an AdditionalStaticObjects.con file run from the Singleplayer/CO-OP con files. Here is an example of how I pathed these structures in "MANSION_OF_THE_SNAKE", a fantastic bf1942 custom map by Natty_Wallo. I had the honor of adding AI to this map.
Now with the static's removed.
I have marked in red a bot spawn point on the back room of the second floor of the building on the right and downstairs in the building on the right. In the upstairs room in the building on the right there is an ammo box. I like to snipe from this room down the road towards a bridge but if a bot knows I am up there he will come and get me.
Converting Back to Pathmaps
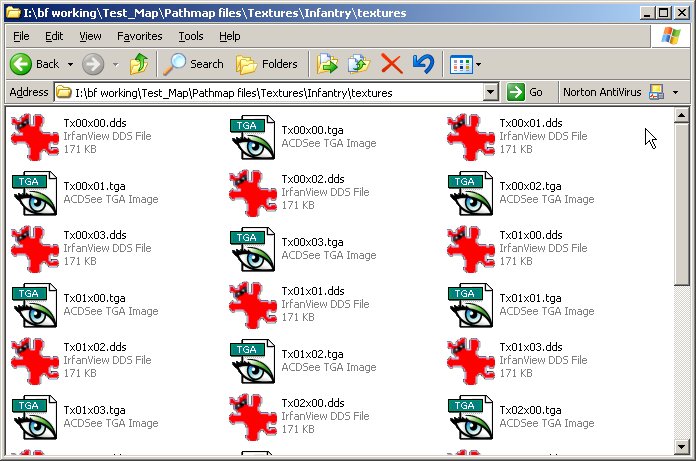
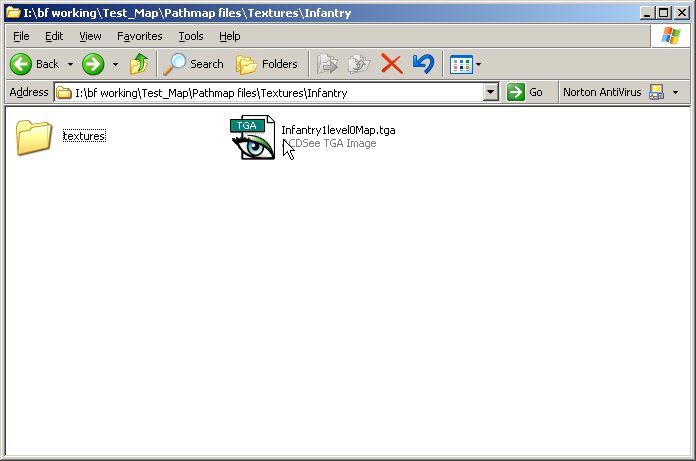
First thing to do is move a copy of your textures for ED42 into your working folder. In this folder place a copy of undxt.exe and undxt.bat into this folder. It should look like this.
Notice my path for reasons of working folder structures. Having this folder set up right can make this process much easier in the long run. You need to keep everything organized and be sure and keep backups of everything. Now double click the undxt.bat file and you will see this cmd window briefly as and the process is finished.
You should see the TGA files in the folder now.
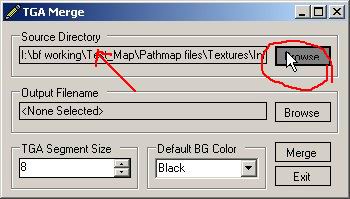
Next we need to open tgaMerge and make all these TGA images into one big one.
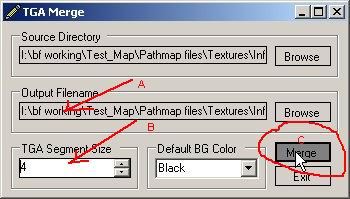
In the Source Directory section Browse to the folder where you have the new tga tiles.
Step A. In the Output Filename section Browse to the folder just above the one you have the texture tiles in. In the save window you need to name it just like the level 0 pathmap you are doing. For this example we are doing infantry so it would be "Infantry1Level0Map" and let it assume the tga extension.
Step B. TGA Segment Size. Set this to the size of the map. This is a small map so it has 4 segments to a side.
Step C. Click on Merge and it will create one large tga image from the small tga tiles.
It should look like this in the working folder. The mouse pointer is pointing at your new tga image and your texture tiles are in the texture folder ... once again here look at folder structure. I am bringing this up because I will be referring back to this "working folder" in this and other tutorials.
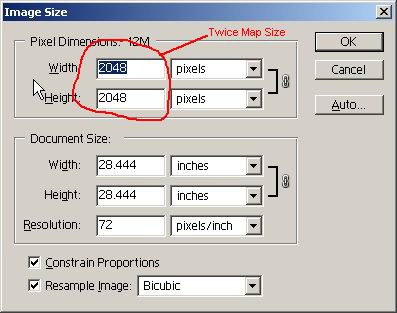
Now we need to open the new large tga in Photo Shop. Now (depending on your version) select > Image > Image Size like the image below.
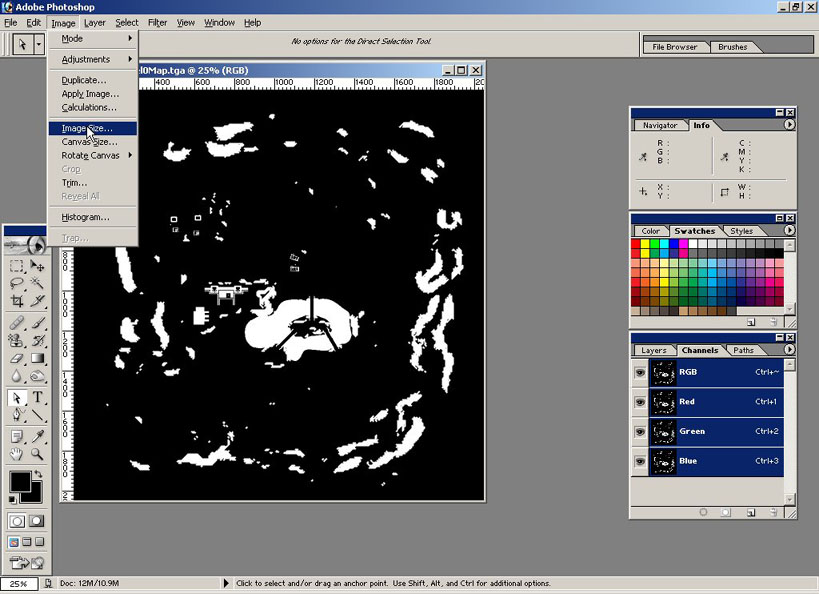
In the Image Size window look where I have the Pixel Dimensions circled. As it shows in red the tga image comes out twice the size of the pathmap.
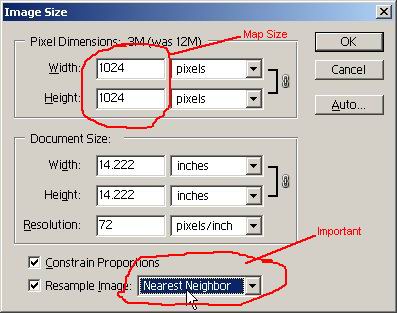
This needs to be resized as shown in the next image of the Image Size window. You see where I have resized the image in the Pixel Dimensions section. The Important area circled is the type of resize to use. Always chose Nearest Neighbor!
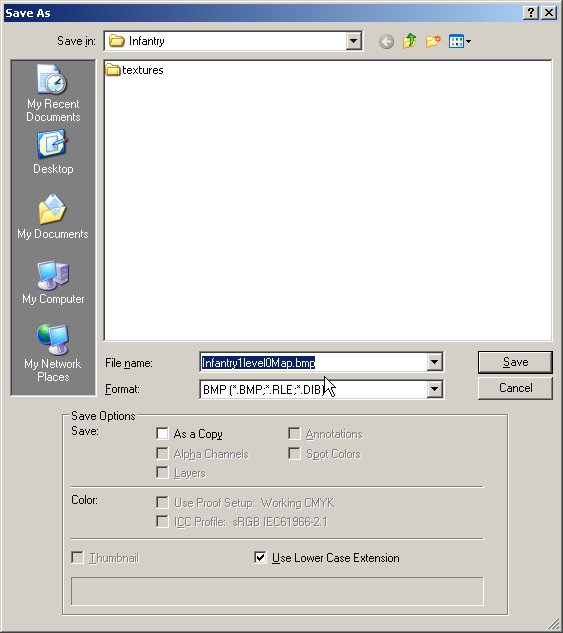
Select OK and now click on > File > Save As > select BMP from the drop down like so.
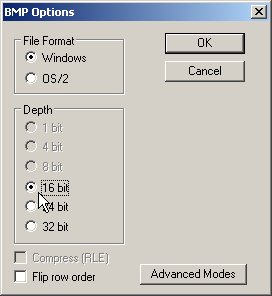
Click Save and you see this selection.
Chose 16 bit (where mouse pointer is) and OK to finish. Go ahead and close Photo Shop now. If you look your working folder should now contain the new bmp file.
Now comes converting this Infantry1level0Map bmp into a set of pathmaps. First we need to convert it to a 1 bit image. I know that 16 bit images do not work well and often result in "inverted colors" in the pathmaps, in other words the do go areas become no go and no go becomes do go, real confusing to the bots and SAI (StrategicArtificalIntellengence). I am thinking that a 8 bit image will work ok but if you have a image editor that can convert to 1 bit always do so. I use ACDC's FotoCanvas Light that comes with the ACDC power pack or IrfanView to do this with. IrfanView is free and be sure to get the plug-in package which has a dds plug-in. This is a great editor that can do batch re-size\batch re-name of multiple files and many other cool things. So once we have converted this image we are ready to use Genpathmaps to create a new set of pathmaps.
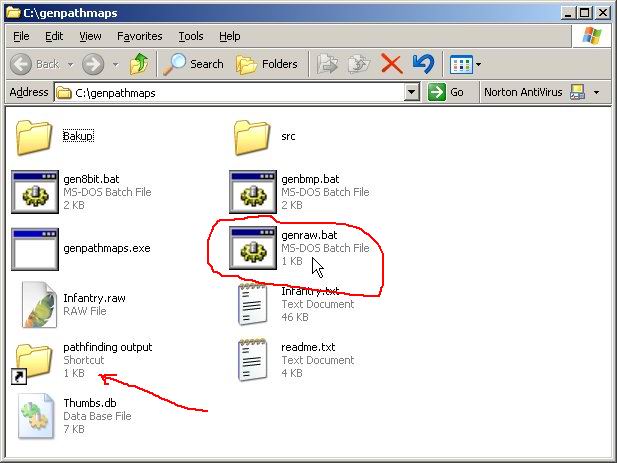
When you open Genpathmaps you should see this depending on how you have it set up. For the new people I will go into detail here. I will have a tutorial on it out soon.
The batch file we will be using is the "genraw.bat" circled in red. The new set of pathmaps generated will go to the pathfinding output folder. I have it indicated with the red arrow as I have a short cut set up. What you do is this. Grab the Infantry1Level0Map.bmp by clicking it once with the left mouse button and holding while dragging it on top of the genraw.bat file. Or you can right click the Infantry1Level0Map.bmp and select copy from the drop down menu. Now right click the genraw.bat file and in the drop down menu select paste. Either way you should see the following cmd window .
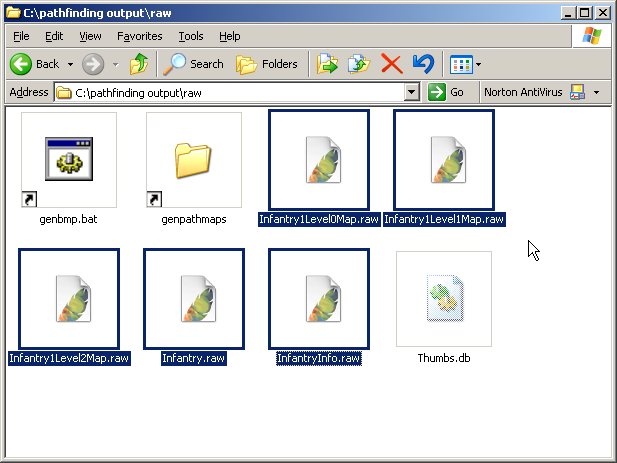
Now look in the pathfinding output > raw folder and you will see your new set of pathmaps.
Now just move these files to your maps "Pathfinding" folder, pack the map, and its ready for Infantry. We still have to look at the vehicle pathmaps yet. Basically the same with some detail changes.